You settle down for your favorite show, grab your Roku remote, and press a button. Instead of switching channels or adjusting the volume, you get a frantic blinking light that does absolutely nothing. It blinks at you like it’s trying to send Morse code, but your TV stays stubbornly unresponsive.
This blinking light issue frustrates thousands of Roku users every day, and it usually shows up at the worst possible time. Your remote is clearly trying to tell you something, but what exactly?
In this guide, you’ll learn exactly why your Roku remote light keeps blinking, what each pattern means, and how to fix it yourself without calling customer support or buying a new remote.
What That Blinking Light Actually Means
Your Roku remote uses that little LED light as its main way of communicating with you. When everything works fine, you might see a quick flash when you press a button. But when that light starts blinking continuously or refuses to respond at all, something has gone wrong between your remote and your Roku device.
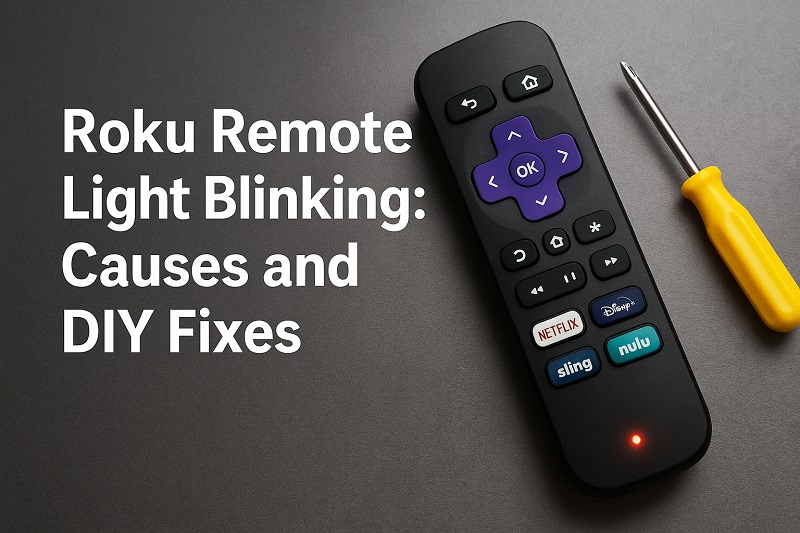
Most Roku remotes come in two types: infrared remotes that need a direct line of sight to your device, and Wi-Fi remotes that connect wirelessly through your home network. The Wi-Fi remotes are the ones with voice control and a pairing button, while the simpler infrared ones look pretty basic and only work when pointed directly at your Roku. Each type has different reasons for acting up, but both show their distress through that blinking light.
When your remote light blinks rapidly or stays lit without doing anything useful, it typically means one of three things: the batteries are dying, the pairing connection broke, or something is blocking the signal. If you ignore these warning signs, your remote might stop working completely. You’ll be stuck either getting up to press buttons directly on your Roku device or digging through drawers to find the old remote you swore you’d never need again.
The blinking pattern itself can tell you a lot. A slow, steady blink usually points to battery issues. Rapid blinking often means pairing problems. If the light stays on solid for a few seconds and then goes dark, you’re probably looking at a connection timeout. Your remote tries its best to reach your Roku, fails, and then gives up until you press another button.
Roku Remote Light Blinking: Likely Causes
Before you can fix your blinking remote, you need to figure out what’s causing the problem. Several different issues can trigger that annoying blinking light, and some are way easier to fix than others.
1. Dead or Weak Batteries
Your batteries might look fine from the outside, but they could be completely drained on the inside. Roku remotes eat through batteries faster than you’d expect, especially if you use voice commands regularly. Even rechargeable batteries lose their charge over time, and cheap dollar-store batteries might die after just a few weeks of use.
Weak batteries cause the remote to behave strangely before dying completely. You might notice the light blinks more slowly than usual, or buttons only work when you press them really hard. Sometimes the remote works fine for simple commands but fails when you try to use voice search or other power-hungry features.
2. Lost Pairing Connection
Wi-Fi remotes need to stay paired with your Roku device through your wireless network. This connection can break for dozens of reasons: a power outage might reset your Roku, a network glitch could interrupt the signal, or a software update might mess up the pairing. Once that connection breaks, your remote basically becomes a useless piece of plastic that blinks at you.
Your Roku device might also drop the pairing if too many devices are trying to connect to your network at once. Think about all the phones, tablets, laptops, and smart home gadgets competing for bandwidth in your house. When your network gets crowded, sometimes your Roku remote loses its spot in line.
Physical distance matters too. If your Roku device sits far from your couch, hidden behind your TV or tucked inside a cabinet, the wireless signal might not reach your remote reliably. Walls, furniture, and other electronics can all weaken the signal between your remote and your Roku.
3. Interference from Other Devices
Your home is full of gadgets broadcasting signals on similar frequencies. Your Wi-Fi router, baby monitors, cordless phones, Bluetooth speakers, and even your microwave can interfere with your Roku remote’s signal. When these signals overlap, your remote’s commands might get scrambled or blocked entirely, causing that blinking light as it tries repeatedly to get through.
Metal objects and thick walls act like signal blockers. If your Roku sits inside a metal TV stand or behind a brick wall, the remote signal has to work extra hard to reach it. Sometimes it makes it through, sometimes it doesn’t, and that inconsistency shows up as random blinking and failed button presses.
4. Software Glitches or Outdated Firmware
Your Roku device and remote both run on software that occasionally needs updating. When that software gets outdated or develops a glitch, communication between the two can break down. Your remote sends perfectly good signals, but your Roku doesn’t know how to interpret them anymore. This creates a frustrating situation where the hardware works fine but the software is confused.
Sometimes these glitches happen after official Roku updates. A new software version might introduce bugs that weren’t there before, or it might change how remotes connect to devices. Your remote keeps doing things the old way while your Roku expects something new, and they end up speaking different languages.
5. Physical Damage or Dirty Contacts
Remotes take a beating. They get dropped, sat on, spilled on, and stuffed between couch cushions. All that rough treatment can damage the internal components or knock the battery contacts out of alignment. Even if the remote looks fine on the outside, something inside might be broken or disconnected.
Dust, dirt, and corrosion build up on battery contacts over time. This gunk creates a barrier between your batteries and the remote’s electrical system. Your batteries might have plenty of juice left, but the power can’t flow properly through dirty or corroded contacts. This causes weak signals, random blinking, and buttons that only work sometimes.
Roku Remote Light Blinking: DIY Fixes
Now that you know what’s causing your remote to act up, let’s get it working again. These fixes are straightforward and don’t require any special tools or technical knowledge.
1. Replace the Batteries
Start with the simplest fix first. Pop open the battery compartment on the back of your remote and swap in fresh batteries. Make sure you use quality alkaline batteries from a reputable brand rather than cheap ones that die quickly. Check the battery orientation too, because putting them in backwards won’t work no matter how fresh they are.
If your remote uses rechargeable batteries, make sure they’re fully charged before inserting them. Even rechargeable batteries eventually wear out and stop holding a charge, so consider replacing them if they’re more than a year old. While you have the batteries out, look at the contacts inside the remote. If you see any green or white crusty buildup, that’s corrosion.
Clean the battery contacts gently with a cotton swab dipped in rubbing alcohol or white vinegar. Scrub until the metal looks shiny again, then let everything dry completely before putting new batteries in. This simple cleaning can fix connection issues that make your remote blink uselessly.
2. Re-Pair Your Remote
If you have a Wi-Fi remote (the kind with a pairing button), you’ll need to reconnect it to your Roku. First, unplug your Roku device from power and wait about 10 seconds. While it’s unplugged, take the batteries out of your remote. Plug your Roku back in and wait for it to fully boot up until you see the home screen.
Put the batteries back in your remote and find the pairing button. It’s usually inside the battery compartment or on the bottom of the remote. Press and hold this button for about 5 seconds until you see the pairing light flash rapidly. Your Roku should detect the remote and display a pairing message on screen. Wait for the process to complete, which usually takes 30 seconds or less.
3. Move Your Roku Device
Sometimes the fix is as simple as relocating your Roku. If it’s hidden behind your TV or buried in an entertainment center, move it out in the open where signals can reach it easily. Place it on top of your TV stand or mount it on the side of your TV where it has a clear path to your seating area.
Keep your Roku away from other electronic devices that might cause interference. Don’t stack it on top of your cable box or Wi-Fi router. Leave at least a few inches of space around it for ventilation and clear signal transmission. This simple repositioning can eliminate interference and restore your remote’s functionality.
For infrared remotes, make sure nothing blocks the line of sight between your remote and the Roku device. Even a thin piece of furniture or a decorative item can block the infrared signal completely. Test your remote from different angles to find the sweet spot where it works reliably.
4. Reset Your Roku Device
A full reset can clear up software glitches that interfere with remote communication. Go to your Roku’s settings using the physical buttons on the device itself or a working remote. Look for System, then Advanced System Settings, and finally Factory Reset. Follow the on-screen prompts to complete the reset.
Keep in mind that a factory reset erases all your settings, preferences, and installed channels. You’ll need to set everything up again from scratch, including signing back into all your streaming services. This takes time, but it often fixes stubborn remote problems that nothing else can solve.
After the reset finishes, your Roku will restart and walk you through the setup process again. When prompted to pair your remote, follow the pairing instructions carefully. Your remote should connect properly to the freshly reset device without any lingering glitches.
5. Check for Roku Updates
Outdated software can cause compatibility issues between your remote and Roku device. Go to Settings, then System, then System Update to check if any updates are available. If you find one, let it download and install completely before testing your remote again.
Your Roku normally updates automatically, but sometimes these updates fail or get interrupted. Manually checking ensures you’re running the latest version with all the newest bug fixes and improvements. After updating, restart both your Roku and your remote by removing the batteries for a few seconds.
6. Try the Roku Mobile App
While you’re troubleshooting your physical remote, download the Roku mobile app on your phone. This app turns your smartphone into a backup remote that works over your Wi-Fi network. You can use it to control your Roku and access all the same features as your regular remote, including voice search and private listening.
The mobile app also helps you fix your physical remote. Use the app to access settings you couldn’t reach before, check for updates, or complete a factory reset if needed. Once your physical remote starts working again, you can keep the app installed as a backup for future emergencies.
7. Contact Roku Support
If you’ve tried everything and your remote still blinks without working, it might be time to reach out to Roku support. Your remote could have a hardware defect that no amount of troubleshooting can fix. Roku’s support team can walk you through advanced fixes or arrange a replacement if your remote is still under warranty.
Before contacting support, gather information about your Roku model number, remote type, and what you’ve already tried. This helps the support team diagnose your problem faster and recommend the right solution. You can reach them through their website, by phone, or through the help section in your Roku account.
Wrapping Up
That blinking light on your Roku remote doesn’t have to ruin your streaming experience. Most of the time, you can fix it yourself in just a few minutes with fresh batteries, a quick re-pairing, or a simple device reset. Start with the easiest solutions first and work your way through the list until something clicks.
Your remote is tougher than it looks, and most blinking light problems come from temporary glitches rather than permanent damage. Keep your batteries fresh, maintain clear line of sight for infrared remotes, and ensure strong Wi-Fi connectivity for wireless remotes. With these simple maintenance habits, you’ll spend less time troubleshooting and more time enjoying your favorite shows.