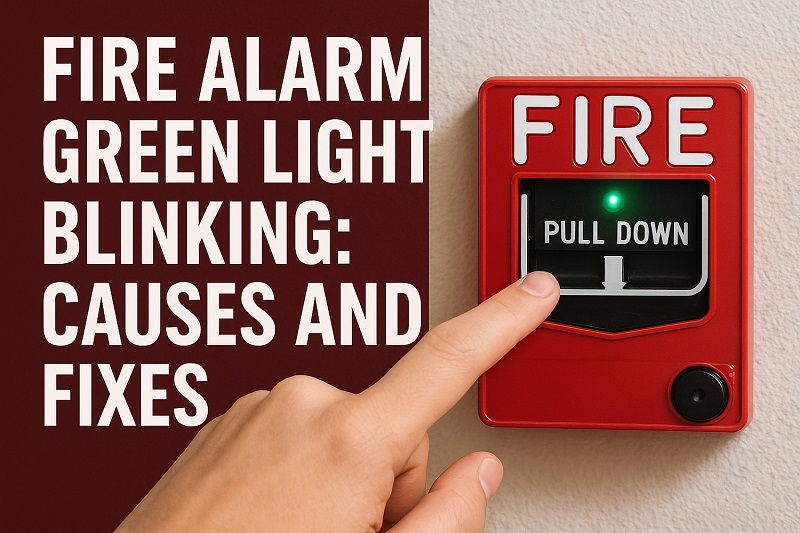
That little green light on your fire alarm has started blinking, and now you’re wondering what it means. Most people expect fire alarms to flash red when there’s trouble, so a blinking green light can catch you off guard.
The truth is, a blinking green light usually signals something different than an emergency. Sometimes it means your alarm is working perfectly fine, while other times it might indicate a minor issue that needs your attention.
This guide will help you understand exactly what that green blinking light means, why it happens, and how you can fix any problems yourself. You’ll learn simple steps to troubleshoot your fire alarm and know when it’s time to call for professional help.
What Does a Blinking Green Light Mean?
Green lights on fire alarms typically indicate normal operation or specific system states. Unlike red lights that scream “danger,” green lights usually mean everything is working as it should. Your fire alarm uses different colored lights to communicate with you about its health and status.
Most fire alarms blink green to show they’re receiving power and functioning properly. This blinking pattern is like your alarm’s way of saying “I’m awake and watching over you.” Some models blink every few seconds during normal operation, while others might blink only when they perform self-tests.
However, the meaning can vary depending on your specific alarm model. Some fire alarms use a blinking green light to indicate they’re in silence mode after you’ve pressed the test button. Others might blink green when they’re connected to a home security system or smart home network.
Certain models flash green during their regular maintenance cycles. These automatic self-checks happen every few minutes or hours, depending on your alarm’s programming. The green blink tells you the alarm just finished checking its sensors, battery levels, and other critical components.
Fire Alarm Green Light Blinking: Common Causes
Understanding why your fire alarm’s green light blinks helps you determine whether action is needed. Each cause has its own characteristics and timing patterns that can guide your troubleshooting efforts.
1. Normal Power Indication
The most common reason for a blinking green light is simply normal operation. Your fire alarm wants you to know it’s receiving power and working correctly. This blinking pattern usually occurs every 30 to 60 seconds, creating a steady, predictable rhythm.
Battery-powered alarms often blink green to show their internal battery is charged and ready. Hardwired alarms might blink green to indicate they’re connected to your home’s electrical system. This regular blinking is actually a good sign that your alarm is doing its job.
2. Self-Test Mode Activation
Fire alarms automatically test themselves regularly to ensure all components work properly. During these self-tests, many models blink green to show the testing process is active. These tests check the smoke sensor, battery levels, and internal circuits.
Most alarms perform self-tests every few hours or once daily, depending on the manufacturer. The green blinking during self-tests typically lasts only a few seconds before returning to the normal pattern. This automated testing helps catch potential problems before they become serious issues.
You might notice the green blinking happens at the same time each day if your alarm is programmed for scheduled self-tests. Some smart alarms even send notifications to your phone when they complete these routine checks.
3. Low Battery Warning
Some fire alarm models use a blinking green light to indicate low battery levels. This might seem counterintuitive since many people expect red lights for warnings, but manufacturers use different color codes. The blinking pattern for low batteries is often faster or more frequent than normal operation blinking.
When batteries get low, your alarm needs to work harder to maintain its functions. The increased green blinking serves as an early warning that battery replacement is coming soon. This gives you time to get new batteries before the alarm starts the more urgent low-battery chirping sound.
4. Interconnected System Communication
If your fire alarms are interconnected throughout your home, they communicate with each other regularly. The green blinking light often indicates this communication is happening successfully. When one alarm detects smoke, it sends signals to all connected alarms to trigger them simultaneously.
This interconnected blinking usually happens in short bursts every few minutes. The pattern might be different from standalone alarms because the units are constantly checking their network connections. Some systems use green lights to show the wireless or hardwired connections between alarms are strong and stable.
5. Silence Mode Status
After pressing the silence button during a false alarm, many fire alarms enter a temporary quiet period. During this silence mode, the green light often blinks to show the alarm is temporarily muted but still monitoring for smoke. This prevents the loud alarm sound while keeping the smoke detection active.
The silence mode typically lasts 10 to 15 minutes before the alarm returns to full sensitivity. The green blinking during this time reassures you that the alarm hasn’t been permanently disabled. Once the silence period ends, the alarm resumes normal operation and sound capability.
Some models blink green more rapidly during silence mode to clearly distinguish this state from normal operation. This helps you remember that the alarm is in a temporary quiet state and will return to full alertness soon.
Fire Alarm Green Light Blinking: DIY Fixes
Addressing a blinking green light usually requires simple steps you can handle yourself. These solutions target the most common causes and help restore normal operation to your fire alarm system.
1. Check the User Manual
Your first step should always be consulting your fire alarm’s user manual or manufacturer documentation. Different brands and models use green lights differently, so what’s normal for one alarm might indicate a problem for another. The manual will have a specific section explaining what different light patterns mean for your exact model.
Look for a troubleshooting section that lists light patterns and their meanings. Many manufacturers also provide online resources and videos that demonstrate normal versus problematic blinking patterns. If you don’t have the physical manual, most manufacturers offer downloadable versions on their websites.
Keep this information handy for future reference. Understanding your specific alarm’s behavior helps you quickly identify when something changes or when professional help might be needed.
2. Test the Alarm Function
Press your fire alarm’s test button to check if it’s working properly. The alarm should produce a loud sound and might change its light pattern temporarily. After the test, observe whether the green blinking returns to its previous pattern or changes significantly.
During the test, pay attention to how quickly the alarm responds and whether the sound is clear and loud. A properly functioning alarm will have a strong, immediate response to the test button. The green light behavior after testing can tell you whether the alarm is operating normally.
If the alarm doesn’t respond to the test button or the sound seems weak, this might indicate a more serious problem that needs professional attention. Document any unusual patterns you notice during testing.
3. Replace the Batteries
Even if low battery isn’t the obvious cause, replacing the batteries can resolve many green light issues. Old batteries might not provide consistent power, causing irregular blinking patterns. Use high-quality alkaline batteries or lithium batteries for longer life.
Remove the old batteries and clean the battery contacts with a dry cloth to remove any corrosion or dust. Insert the new batteries, making sure they’re properly aligned with the positive and negative terminals. Close the battery compartment securely and test the alarm to see if the blinking pattern changes.
Some alarms require a reset after battery replacement. Check your manual for any specific reset procedures that might be needed. Fresh batteries often resolve intermittent green light issues and ensure reliable operation.
4. Clean the Alarm Unit
Dust and debris can interfere with your fire alarm’s sensors and cause unusual light patterns. Turn off power to hardwired alarms at the circuit breaker before cleaning. For battery-powered alarms, remove the batteries first for safety.
Use a vacuum cleaner with a soft brush attachment to gently remove dust from the alarm’s exterior and sensor openings. Avoid using water or cleaning chemicals, as these can damage the sensitive electronic components. Pay special attention to the smoke sensor chamber, where dust buildup is most problematic.
Wipe the exterior with a dry, soft cloth to remove any remaining dust or residue. After cleaning, reinstall batteries or restore power and test the alarm. Clean sensors often resolve erratic blinking patterns and improve overall alarm performance.
5. Reset the Alarm System
Many fire alarm issues can be resolved with a simple reset procedure. For battery-powered alarms, remove the batteries for about 10 minutes, then reinstall them. This clears the alarm’s memory and allows it to restart with fresh settings.
Hardwired alarms might require turning off the circuit breaker, removing the alarm from its mounting bracket, and disconnecting the wiring harness for a few minutes. After reconnecting everything, restore power and observe the light pattern. Some alarms have specific reset buttons that need to be held for several seconds.
After resetting, allow the alarm to complete its initialization process, which might take several minutes. The green light pattern should return to normal operation once the reset is complete and the alarm has finished its startup sequence.
6. Contact a Professional
If all the above solutions fail to resolve the blinking green light issue, it’s time to contact a qualified electrician or fire safety technician. Persistent unusual light patterns might indicate internal component failure or wiring problems that require professional diagnosis and repair.
Professional technicians have specialized tools and knowledge to identify problems that aren’t obvious to homeowners. They can also ensure your fire alarm system meets current safety codes and functions properly. Don’t ignore persistent issues, as they might compromise your home’s fire protection.
Wrapping Up
A blinking green light on your fire alarm usually isn’t cause for panic, but it does deserve your attention. Most of the time, it’s simply your alarm’s way of showing you it’s working properly and keeping your home safe.
The simple fixes we’ve covered can resolve most green light issues you’ll encounter. Regular maintenance, fresh batteries, and occasional cleaning keep your fire alarms functioning reliably. When in doubt, consulting your user manual or calling a professional ensures your family’s safety remains the top priority.