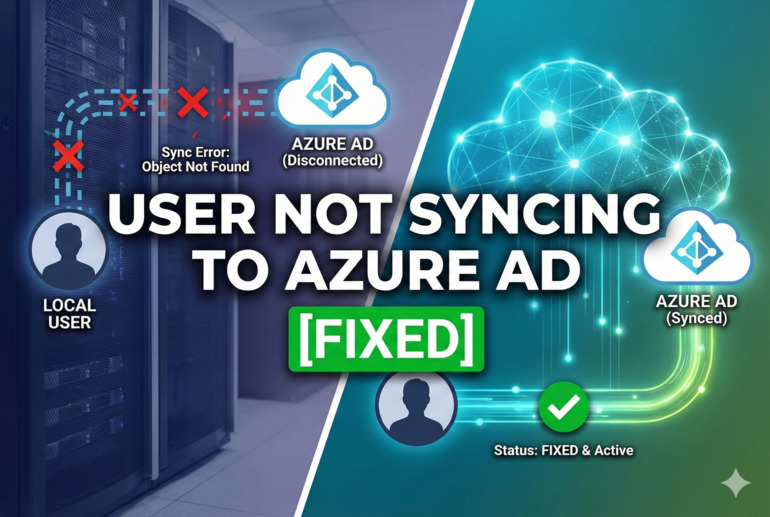
Your company just hired someone new, and you set up their account. Everything looks good on your end. But here’s the frustrating part: their profile isn’t showing up in Azure AD. You check once, then twice, then maybe a third time hoping it magically appears.
This sync issue happens more often than you’d think. It can leave new employees waiting around, unable to access the tools they need to start working.
Let me walk you through what’s really going on here, why it happens, and exactly how to fix it so you can get things running smoothly again.
What’s Actually Happening With This Sync Problem
Azure Active Directory, or Azure AD for short, acts like a big digital phonebook for your organization. It keeps track of everyone who works there, what they can access, and how they log in. Most companies use something called Active Directory on their local network, and Azure AD Connect is the bridge that copies information from your local setup to the cloud version.
When this bridge stops working properly, new users get stuck. Their accounts exist on your local server, but Azure AD has no idea they’re there. Think of it like writing someone’s name in your personal notebook but forgetting to add them to the shared contact list everyone else uses. Your IT team can see the user locally, but cloud services like Microsoft 365, SharePoint, or Teams can’t see them at all.
This creates real problems fast. New hires can’t get their email set up. They can’t access shared files. They’re basically sitting at their desk with a computer that doesn’t do much. Worse yet, if you’re troubleshooting this while juggling other tasks, it eats up time you don’t have.
The sync process typically runs every 30 minutes by default. But sometimes it fails silently, or the user doesn’t meet certain conditions to sync over. You might not even get an error message telling you something went wrong. That’s what makes this issue particularly annoying to deal with.
User Not Syncing to Azure AD: Common Causes
Several things can prevent a user from syncing properly, and figuring out which one is affecting you saves a lot of trial and error. Let me break down the usual suspects so you know what to look for.
1. The User’s Organizational Unit Isn’t Selected for Sync
Azure AD Connect doesn’t automatically sync every single user in your Active Directory. You get to choose which parts of your directory tree actually send data to the cloud. These parts are called Organizational Units, or OUs.
If you created a new user in an OU that isn’t on the sync list, they’ll never make it to Azure AD. It’s like trying to board a train that doesn’t stop at your station. The sync service runs perfectly fine, but it simply skips over that whole section of users.
This happens a lot when companies reorganize their directory structure or when someone creates accounts in the wrong location without realizing the consequences. Checking your OU filtering settings should be one of your first stops.
2. Duplicate Attributes Are Causing Conflicts
Azure AD needs certain pieces of information to be unique for each user. Things like email addresses, usernames, and employee IDs can’t be duplicated. If the system detects a match that already exists, it refuses to sync the new user.
Picture trying to file two different people under the exact same name in a filing cabinet. The system doesn’t know which one is correct, so it just stops and waits for you to fix it. Sometimes this happens because someone typed the same email address for two different people by accident. Other times, an old account that was never properly deleted is still hanging around with that information.
3. Sync Service Stopped or Isn’t Running
The Azure AD Connect sync service needs to be actively running on your server for anything to happen. If the service stopped for any reason, nothing gets sent to the cloud until you restart it.
This can happen after Windows updates, server restarts, or if someone accidentally stopped the service while troubleshooting something else. The service might also fail to start automatically if there’s a dependency issue or if something else on the server is having problems.
You might think everything’s fine because you don’t see any obvious errors, but meanwhile the whole sync process is just sitting there doing nothing.
4. User Object Has Invalid or Missing Required Attributes
Azure AD expects certain information to be filled out for every user. If critical fields are blank or contain invalid data, the sync gets rejected. Required attributes usually include things like a proper username format, a valid email address, and sometimes specific formatting rules your organization set up.
For example, if the user’s email address is missing the “@” symbol or domain name, Azure AD won’t accept it. Same goes for usernames that don’t follow naming conventions. Some companies require employee numbers in a specific format, and if yours doesn’t match, the sync fails.
Even small typos can cause big problems here. An extra space at the end of an email address, a special character where it shouldn’t be, or a field left completely blank when it needs data will all stop the sync cold.
5. Filtering Rules Are Blocking the User
Azure AD Connect lets you set up rules that automatically exclude certain users from syncing. Maybe you only want to sync people in specific departments, or you want to exclude service accounts and test users from cluttering up your cloud directory.
These filtering rules work great when set up correctly. But if someone configured them too broadly or didn’t update them when company policies changed, legitimate users can get caught in the filter. The sync service sees these users, checks them against the rules, and decides they shouldn’t be synced based on whatever criteria was set.
User Not Syncing to Azure AD: DIY Fixes
Now that you know what might be causing the problem, let’s get into actually fixing it. Most of these solutions are straightforward and don’t require any advanced technical skills.
1. Verify the User’s OU Is Included in Sync Settings
Open the Azure AD Connect tool on your sync server. Look for the option to configure directory synchronization or filtering. You’ll see a list of Organizational Units with checkboxes next to them.
Find where your user account lives in Active Directory and make sure that specific OU has a checkmark. If it doesn’t, check it and apply the changes. The next sync cycle should pick up your user.
Keep in mind that even after you enable the OU, you might need to wait up to 30 minutes for the automatic sync to run. If you’re in a hurry, you can force an immediate sync using PowerShell, but the regular cycle works fine if you can wait a bit.
2. Check for Duplicate Attributes
Pull up Active Directory Users and Computers. Search for the email address, username, or employee ID of the user who isn’t syncing. See if anything else pops up with the same information.
If you find a duplicate, you’ll need to decide which account is correct. Maybe there’s an old account from a previous employee that was never deleted. Maybe someone made a typo when creating a test account. Change or remove the duplicate information from the account you don’t need.
After clearing the conflict, the sync should work on its next run. Azure AD will finally have unique information to work with and won’t have any reason to reject the user anymore.
3. Restart the Azure AD Connect Sync Service
Go to your sync server and open the Services management console. You can find this by typing “services.msc” in the Windows search bar. Scroll down until you see “Microsoft Azure AD Sync” in the list.
Right-click on it and choose “Restart.” Wait a few seconds for it to stop completely, then start back up. You should see the status change to “Running” once it’s back online.
Give it a few minutes after restarting, then check if your user appears in Azure AD. Sometimes a simple restart clears up temporary glitches that were preventing the sync from completing properly. If the service won’t start at all, you might have a bigger problem that needs deeper investigation.
4. Validate and Fix User Attributes
Open the properties for your user account in Active Directory. Go through each required field carefully. Make sure the email address is formatted correctly with no extra spaces. Check that the username follows your company’s naming pattern. Verify that any custom attributes your organization requires are filled out properly.
Look for red flags like special characters in places they shouldn’t be, missing domain names, or completely blank fields that need information. Fix anything that looks off or doesn’t match what other working accounts have. Pay special attention to fields that Azure AD specifically requires, which typically include mail, userPrincipalName, and sAMAccountName.
After you make corrections, save the changes and wait for the next sync cycle. You can also trigger a manual sync if you want faster results. The clean data should pass validation this time and make it into Azure AD without issues.
5. Review and Adjust Sync Filtering Rules
Back in the Azure AD Connect configuration tool, find the filtering options. Look at any rules that might be excluding users based on department, location, account type, or other criteria.
Read through each rule carefully. Does your user match any of the exclusion conditions? If they do, you’ll need to either adjust the rule to be more specific or move the user to a group that isn’t filtered out. Some organizations filter based on specific groups, so adding your user to the right security group might solve the problem immediately.
Test your changes by running a sync and checking if the user appears. Filtering rules can be tricky because they’re often set up to serve a specific business need, so make sure you understand why a rule exists before you change it.
6. Force a Manual Sync Cycle
Sometimes you just need to give the system a push. Open PowerShell on your Azure AD Connect server. Type the command “Start-ADSyncSyncCycle -PolicyType Delta” and hit enter.
This tells the sync service to run right away instead of waiting for the scheduled time. You should see a message confirming that synchronization started. Check your Azure AD portal after a few minutes to see if the user showed up.
If none of these fixes work and you’re still stuck, it’s time to reach out to your IT support team or a Microsoft support specialist. Sometimes there are deeper configuration issues or bugs that need expert-level troubleshooting. There’s no shame in calling for backup when you’ve tried everything on your end.
Wrapping Up
Getting users to sync properly keeps your organization running smoothly. Nobody wants to deal with the headache of accounts that half-exist, stuck between your local system and the cloud. Most sync issues come down to configuration settings, duplicate data, or service hiccups that you can fix yourself with a bit of checking.
The key is working through the possibilities methodically instead of randomly changing things and hoping for the best. Start with the quick checks like OU selection and duplicate attributes before moving on to more complex filtering rules. You’ll get your users synced up and back to business faster than you might expect.