You’re working on something important, maybe a presentation or a game, and suddenly you notice your UPS has a yellow light blinking at you. That little light is trying to tell you something, and ignoring it could mean trouble for your devices.
A blinking yellow light on your UPS isn’t something to panic about, but it’s definitely not something you should ignore either. This article will help you understand what that light means, why it’s happening, and most importantly, how you can fix it yourself without calling a technician.
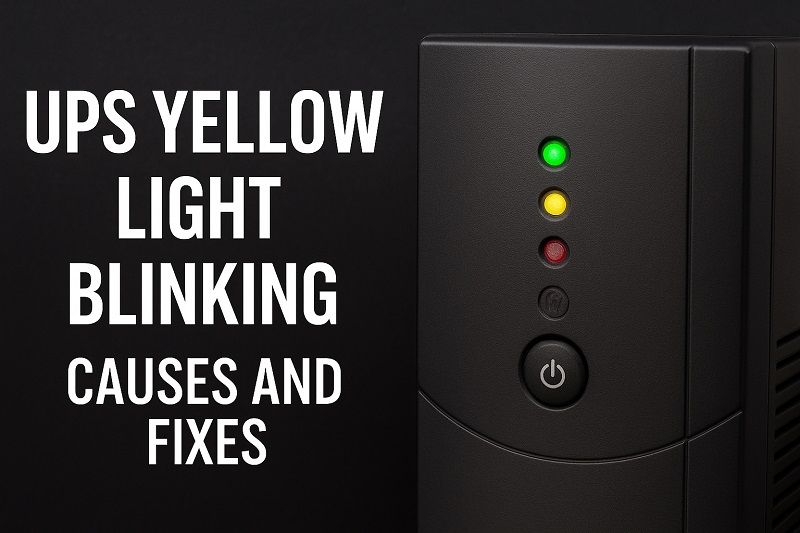
What That Blinking Yellow Light Actually Means
Your UPS uses different colored lights to communicate with you, kind of like how your car’s dashboard tells you when something needs attention. The yellow or amber light typically sits somewhere between the green “all is well” light and the red “serious problem” light. When it blinks, your UPS is basically raising a yellow flag to say something needs your attention soon.
Most UPS units use a blinking yellow light to signal one of several warning conditions. It could mean your battery is running low, there’s an overload on the system, or the battery needs replacing. Some models also use this light to indicate the UPS is operating on battery power because your main power went out. The blinking pattern matters too. A slow blink might mean something different than a rapid one, depending on your UPS model.
Understanding this early warning system is crucial because your UPS stands between your expensive electronics and power problems. When that yellow light starts blinking, your UPS is telling you it might not be able to protect your devices as well as it should. A computer that suddenly loses power can lose unsaved work, corrupt files, or even damage the hard drive.
If you keep ignoring that blinking light, you’re essentially gambling with your equipment. The battery might die completely during the next power outage, leaving your devices unprotected. Worse, an overloaded UPS could overheat or fail entirely, which defeats the whole purpose of having one.
UPS Yellow Light Blinking: Common Causes
Before you can fix the problem, you need to know what’s causing it. Here are the most frequent reasons why your UPS is flashing that yellow light at you.
1. Battery Getting Old or Worn Out
This is probably the most common reason you’ll see that yellow light. UPS batteries don’t last forever, typically giving you about three to five years of good service before they start declining. Think of it like the battery in your phone. After enough charge cycles, it just doesn’t hold power the way it used to.
Your UPS constantly monitors the battery’s health, running small tests to check if it can still handle the load during a power outage. When the battery gets weak, those tests fail, and the yellow light comes on to warn you. The battery might still work for short outages, but it can’t sustain your devices for as long as it should.
You’ll often notice other signs along with the blinking light. The UPS might beep more frequently, or the battery backup time becomes noticeably shorter than before. Some UPS units will even display a “replace battery” message on their screen.
2. Too Many Devices Plugged In
Your UPS has a specific power capacity, usually measured in volt-amperes or watts. When you plug in more devices than it can handle, it triggers an overload warning. That yellow light is your UPS saying “hey, this is too much for me.”
People often make this mistake when they get new equipment. You plug in a new monitor, a printer, an external hard drive, and suddenly you’ve exceeded what your UPS was designed to handle. Even if everything works fine most of the time, the UPS knows it won’t be able to keep all those devices running during a power outage.
3. Power Issues from Your Wall Outlet
Sometimes the problem isn’t with your UPS at all, but with the power coming from your wall outlet. Brownouts, voltage fluctuations, or unstable power can cause your UPS to switch to battery mode frequently. When this happens too often, the yellow light blinks to alert you about the poor input power quality.
Your UPS is designed to filter and stabilize power, but when the incoming power is consistently bad, it puts extra strain on the system. The unit might be switching back and forth between utility power and battery power, which wears out the battery faster and triggers the warning light.
This situation is particularly common in areas with unreliable electrical infrastructure or during storms when the power grid becomes unstable. You might not even notice the lights dimming in your home, but your UPS picks up on these fluctuations immediately.
4. Internal Component Problems
Like any electronic device, a UPS has internal components that can malfunction. The charging circuit might not be working properly, preventing the battery from charging fully. Or the connection between the battery and the main circuit board could be loose or corroded.
These internal issues often develop gradually. Maybe the UPS got moved and something inside got jostled. Perhaps dust and heat have affected the internal components over time. Temperature extremes can also damage sensitive electronics inside the unit.
5. Battery Connection Issues
Sometimes the battery itself is fine, but the connections aren’t. UPS batteries connect to the main unit through terminals and cables, and these connections can become loose, dirty, or corroded over time. When the connection is poor, the UPS can’t properly charge the battery or draw power from it.
This happens more often than you’d think. Vibrations from being on the floor, temperature changes, or just time can cause connections to loosen. Corrosion builds up on metal contacts, especially in humid environments, creating resistance that prevents proper electrical contact.
You might see the yellow light blinking intermittently rather than constantly, which is often a telltale sign of a connection problem. The UPS works fine sometimes, then suddenly the light starts blinking when the connection gets worse.
UPS Yellow Light Blinking: DIY Fixes
Now that you know what might be causing the problem, let’s look at practical solutions you can try yourself. These fixes are arranged from simplest to more involved.
1. Check What’s Plugged In
Start with the easiest fix first. Count up everything plugged into your UPS and check the total power draw. Your UPS should have a label showing its capacity in watts or VA. Add up the power requirements of all your devices, which you can usually find on their labels or power adapters.
If you’re close to or over the limit, unplug some devices. Not everything needs battery backup. Your printer, desk lamp, or phone charger can plug directly into the wall outlet. Save the UPS outlets for critical equipment like your computer, monitor, and modem. After unplugging excess devices, press the reset button on your UPS or unplug it for 30 seconds, then plug it back in. The yellow light should stop blinking if overload was your problem.
2. Test Your Battery
Most UPS units have a test button, usually labeled clearly on the front panel. Unplug the UPS from the wall outlet, then press and hold the test button for a few seconds. This simulates a power outage and lets you see how well the battery performs.
Watch what happens. If the UPS keeps your devices running for a reasonable time without the yellow light, your battery might be okay. But if the light keeps blinking, or the battery drains much faster than it should, you’ve confirmed the battery needs attention. A UPS that used to run your computer for 20 minutes but now dies after five minutes is definitely telling you the battery is worn out.
Some newer UPS models have diagnostic software you can install on your computer. This software gives you detailed information about battery health and can even predict when the battery will need replacing.
3. Clean the Battery Connections
Turn off and unplug your UPS completely. Open the battery compartment, which usually involves removing a few screws or sliding off a panel on the back or bottom of the unit. You’ll see the battery with cables connected to terminals.
Carefully disconnect the battery cables, noting which cable goes where. Take a clean, dry cloth and wipe down the battery terminals and cable connectors. If you see corrosion, which looks like white or green crusty buildup, use a cotton swab dipped in rubbing alcohol to clean it off. Let everything dry completely, then reconnect the cables firmly. Make sure they’re tight and secure.
Close up the battery compartment, plug your UPS back in, and give it a few hours to charge. Often this simple cleaning resolves connection issues that were causing the yellow light to blink.
4. Replace the Battery
If your battery is old or failed the test, replacing it is usually straightforward and much cheaper than buying a new UPS. You can order replacement batteries online by searching for your UPS model number plus “replacement battery.” Make sure you get the exact type specified for your model.
When the new battery arrives, unplug the UPS and open the battery compartment. Disconnect the old battery, noting the cable arrangement. Lift out the old battery, which can be heavy, so use both hands. Place the new battery in the same position, connect the cables to the correct terminals, and close the compartment.
Plug in the UPS and let the new battery charge for at least four hours before using it. The yellow light should stop blinking once the new battery is fully charged and the UPS verifies it’s working properly. Some units might need a few charge and discharge cycles before they stop showing the warning light, so give it a day or two.
5. Check Your Home’s Power Quality
If you suspect poor incoming power is the culprit, you can verify this by plugging the UPS into a different outlet, preferably on a different circuit. If the yellow light stops blinking at the new location, you’ve found your problem. The original outlet might have voltage issues or be on an overloaded circuit.
Consider having an electrician check that outlet and circuit. They can measure the voltage and verify everything is up to code. Sometimes the fix is as simple as moving the UPS to a better outlet. Other times, you might need electrical work to stabilize the power supply. For serious power quality issues, you might even need a voltage regulator installed before your UPS.
6. Reset Your UPS to Factory Settings
Sometimes the UPS just needs a complete reset to clear error codes and recalibrate its systems. The process varies by manufacturer, but typically involves unplugging the unit, pressing and holding the power button for 10 to 15 seconds, then releasing it and waiting a few minutes before plugging back in.
Check your UPS manual for the specific reset procedure for your model. Some units have a small reset button you need to press with a paperclip. Others require you to press a combination of buttons in a specific sequence.
After the reset, let the UPS charge fully before connecting your devices. This gives the unit time to run its internal diagnostics and verify everything is working correctly. The yellow light should clear if the problem was a software glitch or calibration issue.
7. Contact a Professional
If you’ve tried everything and that yellow light keeps blinking, it’s time to call in expert help. Reach out to a qualified electronics technician or contact the UPS manufacturer’s support team. They can run advanced diagnostics and determine if there’s an internal component failure that needs professional repair.
Some problems, like failed charging circuits or damaged internal boards, require specialized tools and knowledge to fix safely. Trying to repair these yourself could void your warranty or create safety hazards. Professional technicians have the experience to quickly identify problems you might miss and access to parts that aren’t available to consumers.
Wrapping Up
That blinking yellow light on your UPS might seem annoying, but it’s actually your early warning system working exactly as designed. By paying attention to it and taking action, you’re protecting both your UPS and the valuable devices connected to it.
Most of these fixes are simple enough for anyone to try, even if you’re not particularly technical. Start with the easy solutions like checking for overloads and testing the battery, then work your way up to more involved fixes if needed. Keep your UPS maintained, and it’ll keep your devices safe for years to come.