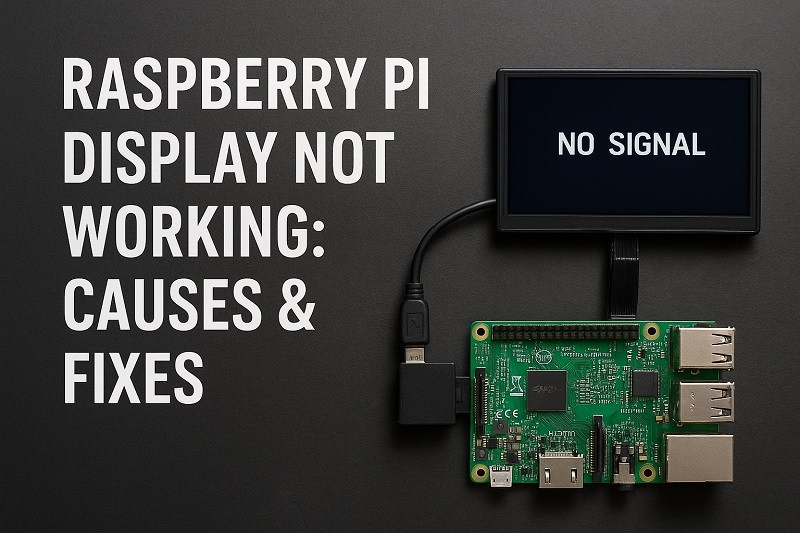
Your Raspberry Pi boots up fine, the green LED blinks happily, but your screen stays completely black. Sound familiar? This frustrating scenario happens to countless Pi users, from beginners setting up their first project to experienced makers working on complex builds.
The good news is that most Raspberry Pi display problems have straightforward solutions you can tackle at home. Whether you’re dealing with a blank screen, flickering display, or wrong resolution, the fixes usually involve simple configuration changes or basic hardware checks.
By the end of this guide, you’ll know exactly how to diagnose display issues, understand what causes them, and fix them using practical steps that actually work.
Understanding Raspberry Pi Display Problems
Display issues with Raspberry Pi can range from completely blank screens to distorted images that make your project unusable. These problems typically fall into three categories: no display at all, partial display with artifacts, or incorrect display settings that make everything look wrong.
A blank screen is the most common issue. Your Pi might be running perfectly fine in the background, but without visual feedback, you can’t interact with it properly. Sometimes you’ll see the initial boot messages flash briefly before everything goes dark. Other times, nothing appears from the moment you plug in the power.
Flickering or unstable displays create their own headaches. Your screen might show the desktop for a few seconds, then go black, or display strange colors and lines that make text impossible to read. These intermittent problems can be even more frustrating than a completely dead screen because they seem to work sometimes.
Wrong resolutions and overscan issues round out the common display problems. Your Pi might display everything, but it’s either too small to read comfortably or parts of the screen get cut off at the edges. These problems make using your Pi awkward and can strain your eyes during longer work sessions.
Raspberry Pi Display Not Working: Common Causes
Display problems usually stem from a handful of predictable issues that affect how your Pi communicates with your monitor or TV. Understanding these causes helps you troubleshoot more effectively and prevents similar problems in future projects.
Let’s examine the most frequent culprits behind display failures and how they impact your Pi’s video output.
1. Inadequate Power Supply
Your Raspberry Pi needs steady, clean power to drive both its processor and the video output circuitry. When the power supply can’t deliver enough current or produces unstable voltage, the display often suffers first.
Insufficient amperage is surprisingly common. Many people use phone chargers or generic USB adapters that claim to provide enough power but fail under load. Your Pi might boot successfully with a weak power supply, but struggle when it tries to output high-resolution video signals.
Voltage drops during operation create intermittent display problems. You might see flickering, random shutdowns, or displays that work fine at startup but fail when you launch graphics-intensive applications. The Pi’s power LED might dim or the rainbow square might appear in the corner of your screen, both signs of power issues.
2. HDMI Configuration Problems
The Raspberry Pi’s HDMI output relies on proper configuration settings to communicate with your display device. When these settings don’t match your monitor’s capabilities, you get no picture or a distorted one.
HDMI mode detection failures happen frequently with older monitors or TVs that don’t properly communicate their supported resolutions. Your Pi might default to a video mode your display simply can’t handle, resulting in a black screen even though everything else works fine.
Overscan settings can push parts of the display off-screen. This legacy feature from old CRT TVs sometimes gets enabled automatically, making your desktop appear smaller than your screen or cutting off important interface elements around the edges.
3. Faulty or Incompatible Cables
HDMI cables seem simple, but they can cause surprising numbers of display problems. Not all cables handle high-resolution signals equally well, and damage from repeated plugging and unplugging creates intermittent connections.
Cable quality matters more than you might expect. Cheap HDMI cables often work fine for basic 1080p signals but fail with higher resolutions or longer cable runs. The symptoms usually include flickering, color distortion, or complete signal loss.
Physical damage to connectors creates unreliable connections that work sometimes but not others. Bent pins, worn connectors, or internal wire breaks cause symptoms that seem random but actually depend on how you position the cable. Sometimes jiggling the cable temporarily restores the signal, which confirms a physical connection problem.
4. Monitor Compatibility Issues
Some displays simply don’t play nicely with Raspberry Pi’s video output, especially older monitors or those designed for specific applications. These compatibility problems can be subtle and confusing to diagnose.
Refresh rate mismatches cause problems with monitors that only support specific frequencies. Your Pi might output a 60Hz signal while your monitor expects 59.93Hz, or vice versa. The result is usually no display or an unstable picture that flickers or rolls.
Resolution timing differences between your Pi and display create similar issues. Even when both devices support the same resolution, they might disagree on the specific timing parameters needed to display it properly.
5. SD Card or Firmware Corruption
Corrupted boot files or firmware can prevent your Pi from initializing its display output correctly. These software problems often develop gradually and might seem to appear randomly.
Boot configuration file corruption affects how your Pi initializes its video system. If the config.txt file gets damaged or modified incorrectly, your Pi might boot but fail to activate the display output. This can happen after improper shutdowns or SD card errors.
Firmware conflicts after updates sometimes break previously working display configurations. Your Pi might work perfectly for months, then suddenly lose display output after a routine system update changes video drivers or configuration defaults.
Raspberry Pi Display Not Working: How to Fix
Most display problems have solutions you can implement yourself using basic tools and a little patience. These fixes address the most common causes and get your Pi’s display working reliably again.
Starting with the simplest solutions often saves time and avoids unnecessary complicated troubleshooting steps.
1. Check Your Power Supply
Power problems cause more display issues than most people realize, so start by ensuring your Pi gets clean, adequate power. This simple check eliminates a major category of potential problems.
Use a quality power supply rated for at least 3A output. Generic phone chargers rarely provide stable power under load, even when they claim sufficient amperage ratings. Official Raspberry Pi power supplies work best, but quality third-party units designed specifically for Pi use also work well.
Look for the rainbow square or lightning bolt symbols in the corner of your screen during boot. These indicate power supply problems that definitely affect display stability. If you see these warnings, replace your power supply before trying other fixes.
Try a different USB cable between your power supply and Pi. Thin or damaged USB cables create voltage drops that mimic power supply problems. Use a short, thick cable designed for power delivery rather than data sync cables that often have thinner conductors.
2. Force HDMI Output Mode
When your Pi can’t detect your display properly, manually configuring the HDMI output usually solves the problem. This bypass automatic detection that often fails with older or unusual monitors.
Edit the config.txt file on your SD card using any computer with an SD card reader. Add these lines to force HDMI output:
hdmi_force_hotplug=1
hdmi_drive=2
Set a specific resolution that matches your display. Add lines like these, adjusting the numbers for your monitor’s native resolution:
hdmi_group=2
hdmi_mode=82
Mode 82 corresponds to 1920×1080 at 60Hz, but you can find other mode numbers in the official Raspberry Pi documentation.
Disable overscan if parts of your display get cut off. Add this line to show the full desktop:
disable_overscan=13. Test Different HDMI Cables and Ports
Cable problems create intermittent issues that seem random but actually result from poor connections or signal degradation. Testing different cables quickly identifies these hardware problems.
Try a known-good HDMI cable from another device like a game console or streaming box. If the display works with a different cable, your original cable needs replacement. High-quality cables matter more for longer runs or higher resolutions.
Switch between HDMI ports on your monitor if it has multiple inputs. Some ports handle signals differently or have better compatibility with certain devices. TVs especially often have one “PC” port that works better with computers than their other HDMI inputs.
Check both ends of the cable for physical damage like bent pins or loose connectors. Even tiny damage can cause signal problems that seem mysterious but have simple hardware causes.
4. Adjust Display Settings Through SSH
When you can’t see your Pi’s desktop, SSH access lets you make configuration changes remotely. This approach works even when the display shows nothing at all.
Enable SSH on your Pi by creating an empty file named “ssh” on the SD card’s boot partition. This allows network access even when you can’t see the screen. You’ll need to know your Pi’s IP address, which you can usually find in your router’s admin interface.
Connect using SSH from another computer and edit the configuration files directly. Use commands like sudo nano /boot/config.txt to modify display settings without needing to see the Pi’s output.
Reboot after making changes and test whether your display works. SSH access means you can try multiple configuration changes quickly without constantly removing and reinserting the SD card.
5. Update Firmware and Software
Outdated firmware sometimes causes display compatibility problems that newer versions fix. Regular updates also prevent conflicts between system components.
Run full system updates using these commands:
sudo apt update
sudo apt upgrade -y
sudo rpi-update
Check for firmware-specific updates that might address display drivers or HDMI compatibility. The rpi-update command specifically targets firmware components that control video output.
Revert recent changes if problems started after updates. Sometimes new software introduces compatibility problems with your specific hardware combination. Rolling back recent changes can restore working display output while you investigate alternative solutions.
6. Reset to Default Configuration
When complex configuration changes create problems, starting fresh with default settings often provides the quickest solution. This approach eliminates configuration conflicts and gives you a clean starting point.
Backup your current config.txt file before making changes, so you can restore any custom settings that were working properly. Copy the file to another location or rename it rather than deleting it completely.
Replace the config.txt with a minimal version containing only essential display settings. Remove all custom video configurations and let your Pi use automatic detection initially.
Test basic functionality first before adding back custom settings one by one. This methodical approach identifies exactly which configuration options cause problems with your specific display setup.
If none of these solutions restore your display, contact a qualified electronics technician or Raspberry Pi specialist. Complex hardware failures or unusual compatibility problems sometimes require professional diagnosis and repair.
Wrapping Up
Display problems with Raspberry Pi usually have straightforward solutions once you understand the common causes. Power supply issues, HDMI configuration problems, and cable faults account for most cases where your screen stays black or shows distorted images.
The systematic approach works best: start with power supply checks, then move through HDMI settings, cable testing, and software updates. Most users find their solution within the first few steps, getting their Pi projects back on track quickly and reliably.