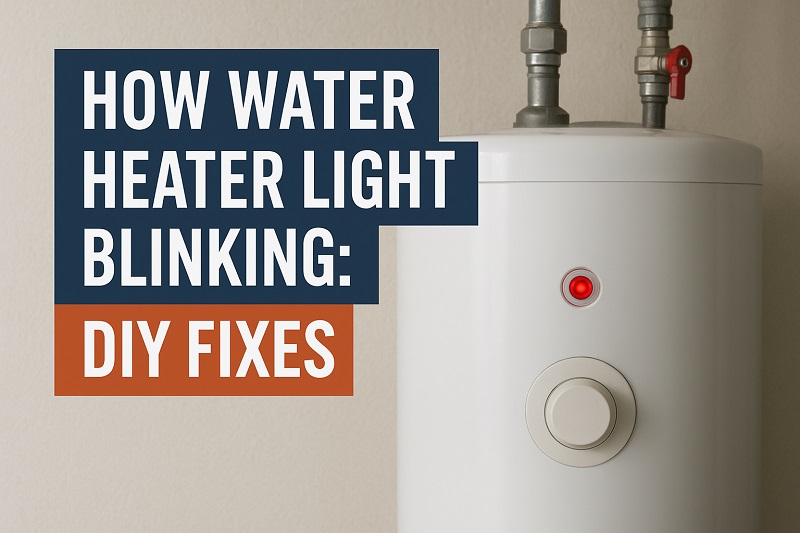
You walk into your utility room and notice something odd. That little light on your water heater is blinking at you like it’s trying to send morse code. Your first thought? Something’s wrong, and you might need to call someone expensive.
Here’s what I can tell you after fixing dozens of these: a blinking light on your water heater isn’t always a disaster waiting to happen. Most of the time, it’s your heater’s way of telling you exactly what’s bothering it. Think of it as your appliance speaking up before things get serious.
This guide will walk you through what that blinking light means, why it’s happening, and how you can fix it yourself without spending a fortune on a service call.
What That Blinking Light Actually Means
Your water heater’s blinking light is basically its communication system. Modern gas water heaters come equipped with these indicator lights that flash in specific patterns to tell you what’s going on inside. Each brand has its own morse code, so to speak. Some blink once for one issue, twice for another, and so on.
Most manufacturers design these lights to flash a certain number of times, pause, then repeat. You might see four quick blinks, a pause, then four more blinks. That pattern is your heater telling you something specific. Your owner’s manual has a chart that decodes these patterns, but common ones include issues with the pilot light, gas supply, thermocouple problems, or ventilation issues.
Here’s something important to understand: your water heater is actually being helpful here. Instead of just shutting down without warning and leaving you with cold showers, it’s giving you a heads-up. The blinking light usually means the heater has detected something that needs attention and has put itself into a safe mode. Your unit might still work partially, or it might have shut off completely depending on what’s wrong.
When you ignore a blinking light, you’re ignoring your heater’s early warning system. What starts as a simple fix can turn into a bigger problem. That pilot light issue that could have been solved with a quick cleaning might escalate into a complete thermocouple replacement. Or worse, a ventilation problem that goes unchecked could become a safety hazard.
Water Heater Light Blinking: Likely Causes
Several things can trigger that blinking light, and knowing what they are helps you fix the problem faster. Let me break down the usual suspects based on what I’ve seen in hundreds of service calls.
1. Dirty or Faulty Flame Sensor
The flame sensor is a small rod that sits near your pilot light and burner. Its job is simple: detect when there’s a flame burning. When it gets covered in soot, dust, or mineral deposits, it can’t do its job properly. Your water heater thinks the flame isn’t there even when it is, so it starts blinking that warning light.
This happens more often than you’d think. Every time your burner fires up, tiny particles can accumulate on the sensor. Over time, this buildup creates a barrier between the sensor and the flame it’s trying to detect.
The sensor might also fail electronically. After years of heating and cooling cycles, the metal can degrade or the connection can loosen. When that happens, even a clean sensor won’t send the right signal to your control board.
2. Thermocouple Issues
Your thermocouple is a safety device that keeps gas from flowing unless there’s a flame to burn it. It sits right in the pilot flame and generates a tiny electrical current when heated. If that current stops, the gas valve shuts off immediately. A failing thermocouple will make your pilot light go out repeatedly, triggering that blinking light every single time.
These little devices wear out over time. The constant heating makes the metal fatigue, and eventually it can’t generate enough voltage to keep the gas valve open. You’ll notice your pilot won’t stay lit for more than a few seconds before it dies.
3. Insufficient Air Supply or Ventilation Problems
Your water heater needs air to burn gas properly. When it can’t get enough oxygen, combustion becomes incomplete and potentially dangerous. The heater’s sensors pick up on this and shut things down, making that light blink to alert you. This can happen if your heater is in a closet or small room that’s become too sealed off.
Blocked vents are equally problematic. The flue pipe that carries exhaust gases out of your house needs to stay clear. Bird nests, debris, or even rust buildup inside the pipe can restrict airflow. Your heater detects the backup and protects itself by shutting down.
Sometimes the issue is simply that someone closed off vents or stacked boxes too close to the heater. You’d be surprised how often I find water heaters surrounded by storage items that choke off their air supply.
4. Gas Supply Interruptions
Your water heater needs a steady supply of natural gas or propane to function. When that supply gets interrupted or reduced, the pilot light struggles to stay lit or the main burner can’t fire properly. The control board senses this and starts blinking that warning light.
Gas pressure problems can come from several places. Maybe there’s an issue with your main gas line, or the gas valve on the heater itself is partially closed. Sometimes other appliances on the same line are using gas at the same time, creating a temporary pressure drop.
5. Control Board or Electronic Failures
The control board is your water heater’s brain. It monitors all the sensors, controls the gas valve, and yes, operates that blinking light. When the board itself starts failing, you can get false alarms or error codes that don’t match any actual problem. Electrical surges, age, or moisture damage can all affect the board’s performance.
These failures can be tricky because the board might work fine most of the time, then glitch randomly. You might see different blink patterns at different times, or the light might blink even after you’ve verified everything else is working perfectly.
Water Heater Light Blinking: How to Fix
Now that you know what might be causing the problem, let’s get into the actual fixes. Most of these are straightforward enough that you can handle them with basic tools and a little patience.
1. Clean the Flame Sensor
Start by turning off the gas supply to your water heater and letting everything cool down for at least thirty minutes. Locate the flame sensor, which looks like a thin metal rod near the burner assembly. You’ll need to remove the access panel to get to it.
Once you can reach it, gently remove the sensor by loosening the mounting screw or bracket. Take a piece of fine-grit sandpaper or steel wool and carefully clean the entire surface of the rod. You’re trying to remove any buildup without scratching the metal too deeply. Wipe it clean with a dry cloth.
Reinstall the sensor, making sure it’s positioned correctly in relation to the burner flame. Turn the gas back on, relight your pilot, and check if the blinking stops. This fix works about sixty percent of the time when the sensor is the actual culprit.
2. Replace the Thermocouple
Turn off the gas and let your heater cool completely. The thermocouple connects to the gas control valve with a small nut that you can usually turn by hand or with a wrench. Disconnect it from the valve first, then remove it from its mounting bracket near the pilot light assembly.
Take your old thermocouple to a hardware store to get an exact match. They come in different lengths and connection types, so having the old one helps. Installation is just the reverse: position the tip in the pilot flame area, secure the bracket, and reconnect it to the gas valve. Make sure the connection is snug but don’t overtighten.
Light your pilot and hold the button down for a full minute to let the new thermocouple heat up and generate voltage. Release the button slowly. If the pilot stays lit, you’ve solved the problem. This repair usually costs less than twenty dollars and takes about thirty minutes.
3. Check and Clear Ventilation
Start outside your house and locate where your water heater vents to the exterior. Look for any obvious blockages like leaves, nests, or debris covering the vent cap. Remove anything you find and make sure the cap itself isn’t damaged or rusted shut.
Back inside, inspect the flue pipe that runs from your water heater to the vent. Look for disconnected sections, rust holes, or sagging areas where condensation might collect. The pipe should have a slight upward slope all the way to the exterior vent. If you can safely access it, shine a flashlight up the flue to check for blockages.
Also check the area around your water heater. Make sure there’s at least a foot of clearance on all sides for proper air circulation. Move any stored items away and ensure that air vents in the room are open and unobstructed. Sometimes opening a door or window in the utility room is all it takes to provide enough fresh air.
4. Verify Gas Supply and Pressure
Check that the gas valve leading to your water heater is fully open. The handle should be parallel to the pipe, not perpendicular. If you have other gas appliances, test them to see if they’re working normally. A stove that won’t light or produces weak flames might indicate a broader gas supply issue.
Listen near the gas valve when the burner should be firing. You should hear a faint hissing sound of gas flowing. If you smell gas at any point during this check, leave immediately and call your gas company. Never try to fix an active gas leak yourself.
For pressure issues, you might need to contact your gas company since they control the main line pressure. Explain that your water heater is showing supply problems, and they’ll usually send someone to check the pressure at your meter.
5. Reset the Control System
Many water heater problems clear up with a simple reset of the control board. Find the temperature control dial on your gas valve and turn it to the OFF position. Wait at least five minutes to let the system fully power down and clear any error codes.
After waiting, turn the dial to the pilot position and follow your heater’s lighting instructions. Usually this involves holding down a button while clicking an igniter several times. Once the pilot lights, hold the button for about a minute, then release it and turn the dial to your desired temperature setting.
Watch the indicator light for the next few hours. If the blinking was caused by a temporary glitch or sensor misread, the reset should clear it. If the light starts blinking again with the same pattern, you’re dealing with a persistent issue that needs more attention.
6. Inspect and Test Electrical Connections
If you’re comfortable working around electrical components, check the wiring connections to your gas valve and control board. Turn off power to the water heater first if it has an electrical connection. Look for loose wires, corroded terminals, or any signs of moisture damage.
Tighten any loose connections you find and clean corroded terminals with a wire brush or contact cleaner. Check that ground wires are properly attached. Sometimes a loose wire is all it takes to make the control board act up and trigger false error codes.
This is also a good time to check if your water heater has a dedicated circuit breaker and verify that it hasn’t tripped. Electronic ignition systems need stable power to function correctly.
7. Call a Professional Technician
If you’ve tried these fixes and your light is still blinking, or if you’re not comfortable working with gas appliances, it’s time to call a licensed plumber or HVAC technician. Some problems require specialized tools, replacement parts that need professional installation, or diagnostic equipment to identify exactly what’s failing. A qualified technician can test gas pressure, measure thermocouple voltage, and use multimeters to check control board outputs. They also have access to manufacturer-specific troubleshooting guides and replacement parts that might not be available to consumers. Safety should always come first, especially when dealing with gas appliances.
Wrapping Up
That blinking light on your water heater doesn’t have to mean panic or an expensive repair bill. Most of the time, you’re looking at something you can fix yourself with basic tools and a little time. The key is paying attention to what your heater is trying to tell you through those blink patterns and addressing issues before they grow into bigger problems.
Start with the simplest solutions first, like cleaning sensors and checking ventilation, before moving on to parts replacement. Keep your owner’s manual handy so you can decode those blink patterns accurately. Taking action when you first notice the blinking can save you from cold showers and costly emergency repairs down the line.