You’ve just finished loading your Kenmore dishwasher after a big family dinner, pressed start, and walked away feeling accomplished. But when you return, instead of clean dishes, you’re greeted by a persistently blinking clean light that seems to mock your efforts.
This blinking clean light isn’t just an annoying distraction. It’s your dishwasher’s way of telling you something needs attention before it can complete its job properly.
Throughout this guide, you’ll discover exactly why your Kenmore dishwasher’s clean light keeps blinking, what common issues trigger this behavior, and most importantly, how to fix the problem yourself without calling in expensive repair services.
Understanding the Blinking Clean Light Problem
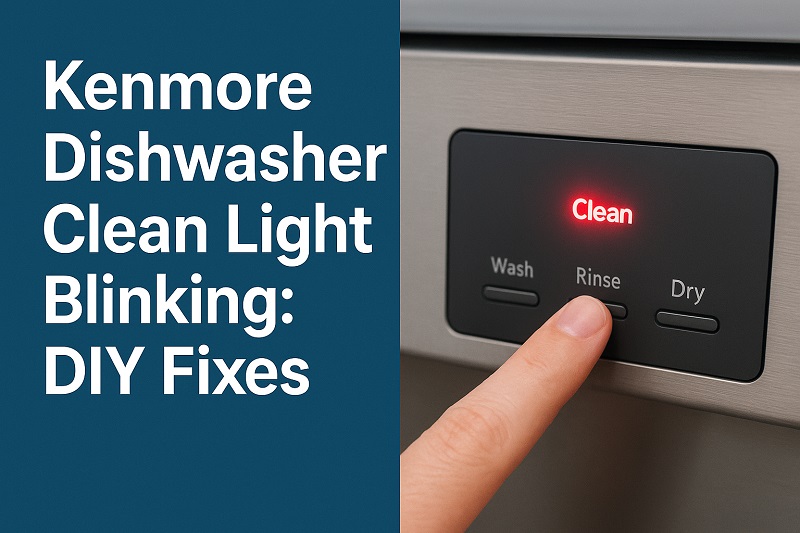
Your Kenmore dishwasher’s clean light serves as a communication tool between you and the machine. When everything runs smoothly, this light stays off during the wash cycle and illuminates steadily once the cycle completes successfully. A blinking pattern, however, signals that something has interrupted the normal operation.
Most Kenmore dishwashers use specific blinking sequences to indicate different problems. The clean light might blink continuously, flash in short bursts, or alternate between on and off states. Each pattern corresponds to a particular issue that prevents your dishwasher from finishing its cycle properly.
The blinking typically occurs when the dishwasher detects an error condition that stops the cleaning process. This safety feature prevents potential damage to your dishes, the machine itself, or your kitchen. Common triggers include water temperature problems, drainage issues, or sensor malfunctions.
Ignoring this blinking light can lead to bigger problems down the road. Your dishes might remain dirty, water could pool inside the machine, or mechanical components might suffer damage from continued operation under fault conditions. Taking quick action when you notice the blinking helps preserve your dishwasher’s lifespan and ensures your dishes get properly cleaned.
Kenmore Dishwasher Clean Light Blinking: Likely Causes
Several factors can trigger your Kenmore dishwasher’s clean light to start blinking unexpectedly. Understanding these root causes helps you target the right solution and avoid unnecessary troubleshooting steps.
1. Water Temperature Issues
Your dishwasher needs water heated to at least 120°F to dissolve detergent properly and sanitize your dishes effectively. When water entering the machine falls below this threshold, the internal sensors detect the problem and trigger the blinking clean light.
Cold water prevents enzymes in your dishwasher detergent from activating, leaving food particles stuck to plates and glasses. The machine recognizes this suboptimal condition and refuses to complete the cycle. Sometimes your home’s water heater settings drop, or high demand from other appliances reduces the available hot water supply.
2. Clogged or Dirty Filters
Food debris, grease, and soap scum gradually accumulate in your dishwasher’s filter system over time. These filters, usually located at the bottom of the tub, catch particles before they can recirculate and redeposit on your dishes.
When filters become severely clogged, water circulation drops dramatically. The dishwasher’s sensors detect this reduced flow and activate the blinking clean light as a warning. Neglecting filter maintenance for months can completely block water movement, making effective cleaning impossible.
3. Drainage Problems
Your Kenmore dishwasher relies on proper drainage to remove dirty water between cycle phases. Blockages in the drain hose, garbage disposal connection, or internal pump can prevent water from exiting the machine completely.
Standing water at the bottom of your dishwasher after a cycle indicates drainage trouble. The machine’s sensors detect this remaining water and signal the problem through the blinking clean light. Grease buildup, food particles, or even small utensils can obstruct drainage pathways.
Partial blockages might allow some water to drain while leaving enough behind to trigger the error condition. This creates a frustrating situation where the dishwasher appears to work but never quite finishes properly.
4. Door Latch Malfunction
The door latch mechanism serves a critical safety function by ensuring your dishwasher remains securely closed during operation. Faulty latches can cause intermittent opening during cycles, triggering immediate safety shutdowns.
Even slight misalignment or worn latch components can send mixed signals to the dishwasher’s control system. The machine interprets these inconsistent signals as potential safety hazards and responds by stopping the cycle and activating the blinking clean light.
5. Control Board Glitches
Electronic control boards manage every aspect of your dishwasher’s operation, from cycle timing to sensor monitoring. Power surges, moisture exposure, or simple wear can cause these sensitive components to malfunction.
When the control board experiences glitches, it might misinterpret normal sensor readings or fail to recognize cycle completion properly. This confusion manifests as a blinking clean light even when no actual mechanical problems exist. Software errors within the board can create persistent false alarms that resist simple reset attempts.
Kenmore Dishwasher Clean Light Blinking: How to Fix
These proven solutions address the most common causes behind blinking clean lights in Kenmore dishwashers. Work through them systematically to identify and resolve your specific issue.
1. Reset the Dishwasher
Start with the simplest solution that often resolves temporary glitches and software hiccups. Turn off your dishwasher completely by pressing the power button or switching off the circuit breaker for about five minutes.
This reset period allows the control board to clear any temporary error codes and return to normal operating parameters. During this time, residual electrical charges dissipate from the system’s memory components.
After the waiting period, restore power and try running a short cycle to test whether the blinking clean light persists. Many minor electronic glitches resolve completely with this simple reset procedure, saving you time and effort on more complex troubleshooting steps.
2. Check and Clean the Filters
Remove the bottom dish rack to access your dishwasher’s filter assembly, typically located beneath the lower spray arm. Twist the cylindrical filter counterclockwise to remove it, along with any accompanying fine mesh screens.
Rinse these components under hot running water while gently scrubbing with an old toothbrush to dislodge trapped debris. Pay special attention to the fine mesh areas where tiny food particles tend to accumulate. For stubborn buildup, soak the filters in warm soapy water for 15 minutes before scrubbing.
Inspect the filter housing area inside the dishwasher for any visible debris or buildup. Wipe this area clean with a damp cloth before reinstalling the filters. Ensure all components seat properly and twist the main filter clockwise until it locks securely in place.
3. Verify Water Temperature
Run hot water at your kitchen sink faucet until it reaches maximum temperature, then immediately start your dishwasher cycle. This ensures the machine receives adequately heated water from the beginning of the wash process.
Check your water heater’s temperature setting, which should read between 120°F and 125°F for optimal dishwasher performance. Higher temperatures can damage dishes and waste energy, while lower settings prevent effective cleaning and sanitization.
4. Inspect and Clear Drainage Issues
Look inside your dishwasher tub for standing water that indicates drainage problems. Remove any visible debris from the bottom, including food particles, broken glass, or small utensils that might block the drain area.
Check the connection between your dishwasher’s drain hose and garbage disposal or sink drain. Disconnect this hose carefully and inspect both ends for clogs or kinks that restrict water flow.
If your dishwasher connects to a garbage disposal, run the disposal for 30 seconds to clear any accumulated debris that might back up into the dishwasher drain. Always run cold water while operating the disposal to help flush waste through the system.
Pour two cups of white vinegar into the bottom of your empty dishwasher and run a hot cycle to help dissolve grease and mineral deposits throughout the drainage system. This natural cleaning method often resolves minor blockages without harsh chemicals.
5. Examine the Door Latch
Inspect the door latch mechanism for visible damage, food debris, or misalignment that prevents proper closure. Clean around the latch area with a damp cloth to remove any buildup that might interfere with normal operation.
Test the door by opening and closing it several times, listening for consistent clicking sounds that indicate proper latch engagement. The door should close firmly without excessive force or resistance.
6. Professional Service Call
When all DIY solutions fail to resolve the blinking clean light, contact a qualified appliance repair technician for professional diagnosis and repair. Persistent electronic issues, internal component failures, or complex mechanical problems require specialized tools and expertise beyond typical homeowner capabilities.
Wrap-Up
Your Kenmore dishwasher’s blinking clean light serves as an early warning system that prevents more serious problems from developing. By understanding the common causes and working through these systematic solutions, you can often resolve the issue without expensive service calls.
Most blinking clean light problems stem from simple maintenance issues like dirty filters, water temperature fluctuations, or minor drainage obstructions. Regular cleaning and basic upkeep prevent many of these issues from occurring in the first place, keeping your dishwasher running smoothly for years to come.